1. Open up the program.
You have 3 panels where the views of your 2D scan will appear (sagittal, axial, and coronal planes), a panel where you 3D model will eventually show up, and a control panel.
The control panel is where you're going to do most of your work, and how you fine tune the image to see the styloid processes.
The 3D image is going to be made by putting the 3 planes of your scan together into one image. Think of it like width, depth, and height to make a solid shape.

2. Next, you're going to load your studies into the database.
CT scans are saved as DICOM files (Digital Imaging and Communication in Medicine), which is a standardized file format for recording medical data and imaging. This allows medical professionals to receive and read any medical data anywhere without the trouble of having viewing programs specific to hospitals or regions.
- Select the “Load DICOM” button from the control panel.
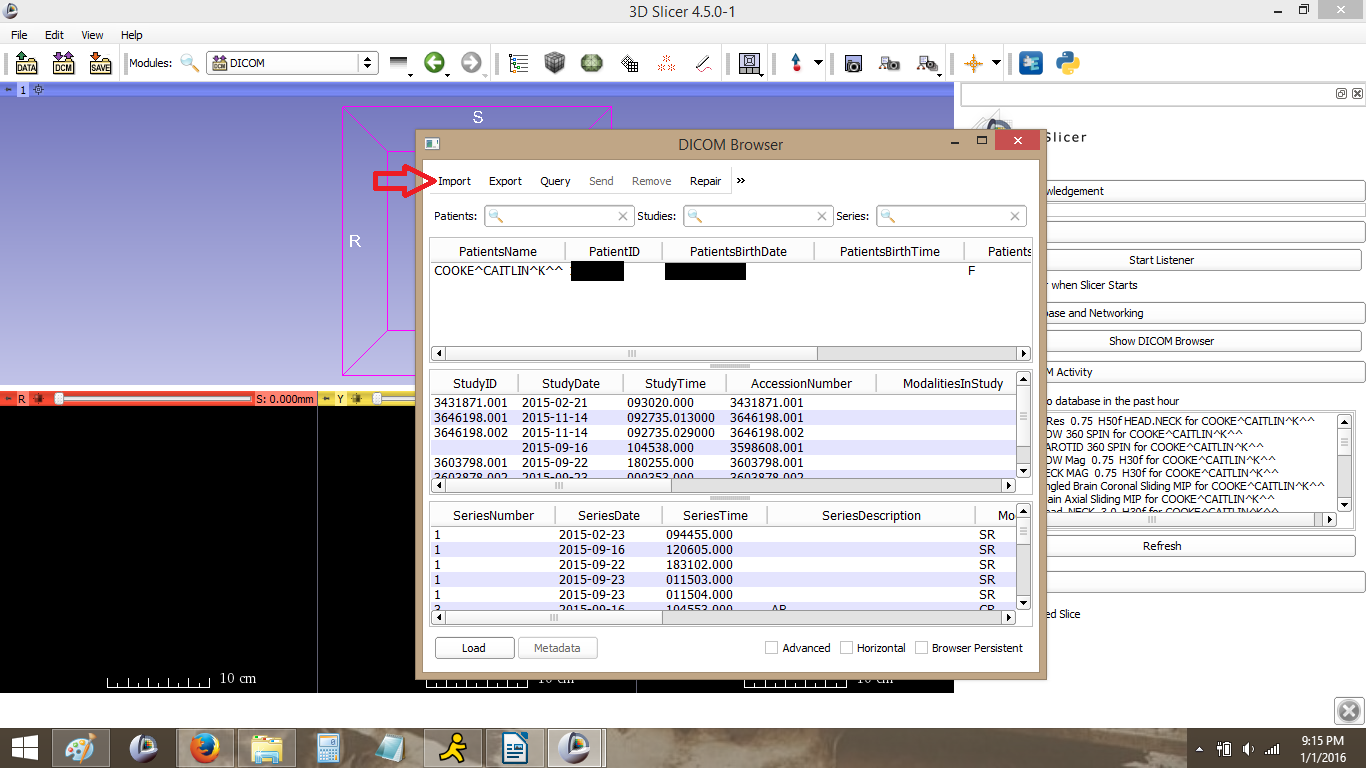
Another window will pop up called your DICOM browser.
(Mine already has my name in the Patients panel and a list of studies and image series because I've been playing around with the program, but originally it should be blank.)
- Select “Import” in the upper left corner (Red Arrow in picture)
This will bring up a familiar looking file directory.
- You're going to be using the data on your CD, so use the “Look In:” drop down menu to find you CD drive and select it to view to files and folders on it.
The folder you want is titled something like “Images”. If yours is different, you can try selecting different things until something finally loads. The program will only accept DICOM files.
These are the typical steps..
Look in:
select My computer
select CD drive (D:)
select (single click) IMAGES folder
click the “Import” button.
- A box will pop up asking “Do you want to copy the files to the local database directly or just add the links”. Select “Add Link”
This may take a little while to load.
Copying the files will save the scan data on your computer directly so you can access it without the CD.
For whatever reason, when I try to copy about half the files don't save or are corrupted. It may be a copy protection, or something wrong with the data put on the CD, but either way the scans Don't open correctly.
Add Link makes the program move slower, but it works every time.
3. Select the study you want to render into a 3D model.
You should now have something in the top PatientsName window, a Study ID number and dates in the panel below it, and a list of option in the bottom Series window.
If not...
- Select the patient name in the top box. (yellow arrow)
This will bring up a list of studies available in the middle box. (green arrow)
Select one of the studies
This will bring up a list of series available in the bottom box. (red arrow)

Especially if you have more than one scan on the CD or a CT with contrast, there's going to be a lot of options.
The tutorials I learned from didn't specify which series made the best models, and some of the Series Descriptions can be a little mysterious (For example, the hospital broke my scan up into 2 studies; before and after contrast injection. There's also 9 different studies called “Head Routine”)
Because if this it may take some trial and error to figure out which study or series gets you the images you want
For this tutorial I've selected HiRes 0.75 H50F Head.Neck (Purple Arrow)
- Click the “Load” button in the bottom left corner.
Loading Will take a few minutes, so go grab a snack.